10 Food Photography Tricks to Make Your Dishes Look Irresistible

Introduction

In a world where Instagram, Pinterest, and food blogs dominate, the ability to capture drool-worthy food photography isn’t just a bonus—it’s a necessity. Whether you’re a food blogger, a chef, or someone who simply enjoys sharing their culinary creations online, making your dishes look irresistible is key to capturing your audience’s attention. But how do you make a simple plate of food look mouth-watering on screen? Let’s dive into some tried and true food photography tricks that will elevate your food shots from average to amazing.

Understanding the Basics of Food Photography

Before we get into the specific tricks, it’s important to understand the fundamentals of food photography. The three pillars you need to focus on are lighting, composition, and angles. These elements can make or break your photo.

Trick 1: Master the Lighting

Food Photography
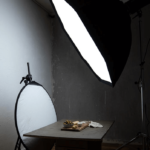
Lighting is the backbone of any great photo, and food photography is no exception. The right lighting can highlight the textures, colors, and details of your dish, making it look as delicious as it tastes.

Natural Light vs. Artificial Light

Food Photography

Whenever possible, use natural light. It’s soft, diffused, and brings out the natural colors of the food. Position your dish near a window to capture that perfect, evenly lit shot. If natural light isn’t available, use artificial light sources, but be sure to soften them with diffusers to avoid harsh shadows.

Using Reflectors and Diffusers

Reflectors help bounce light back onto your dish, reducing shadows and adding depth to your shot. Diffusers, on the other hand, soften the light and create a more natural look. Together, they’re a food photographer’s best friends.

Trick 2: Focus on the Freshness

food photography

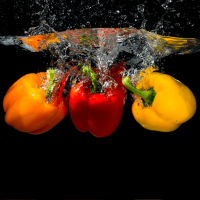
Freshness is key in food photography. Wilted lettuce, dried-out sauces, or soggy textures can turn a potentially great photo into a disaster.

Timing Your Shots

Shoot your food as soon as it’s plated to capture it at its freshest. If you need to take multiple shots, have backup ingredients ready to refresh your dish.

How to Keep Food Looking Fresh During Shoots

To keep your food looking fresh, lightly mist salads with water, brush sauces with oil to give them a glossy finish, and use tweezers to adjust any out-of-place ingredients. A small fan can help keep steam visible in hot dishes.

Trick 3: Use Props Wisely

food photography
Props can add context and interest to your food photography, but they can also overwhelm the main subject if not used wisely.

Background Selection

Choose a background that complements your dish without drawing attention away from it. Neutral tones like wood, marble, or simple tablecloths work well.

Complementary Props

Use props that make sense with the dish you’re photographing. Fresh ingredients, utensils, or a glass of wine can add to the story without overshadowing the food.

Trick 4: Embrace the Power of Color

food photography
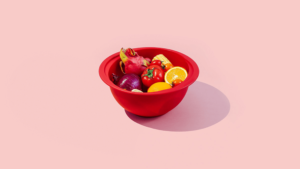
Color is one of the most powerful tools in food photography. It can evoke emotions, highlight certain aspects of the dish, and make your photos pop.

The Psychology of Color in Food Photography

Different colors can evoke different emotions. For example, warm colors like red and orange can make food look more appetizing, while cool colors like blue can be unappealing if overused.

Contrasting Colors to Highlight Dishes

Use contrasting colors to make your dish stand out. A vibrant green garnish on a deep red sauce, or a bright yellow lemon wedge against a blue plate, can make the colors in your food pop.

Trick 5: Play with Perspectives

The angle you shoot from can drastically change the way your food looks. Experimenting with different perspectives can add variety and interest to your shots.

Overhead Shots

Overhead shots are perfect for capturing flat lays, like a beautifully arranged charcuterie board or a table full of dishes. This angle is clean and showcases all the elements in the frame.

Close-ups and Macro Photography

Close-ups are great for highlighting the details of your dish, like the texture of a slice of cake or the bubbles in a glass of champagne. Macro photography can bring out even more intricate details, making your audience feel like they can reach out and touch the food.

Trick 6: Keep It Simple

When in doubt, less is more. A cluttered photo can distract from the main subject, so keep your composition clean and focused.

Avoid Clutter in Your Shots

Remove any unnecessary items from your frame that don’t contribute to the story. A clean, simple composition helps the food shine.

The Beauty of Minimalist Food Photography

Minimalism in food photography allows the viewer to focus on the beauty and details of the dish. Sometimes, a single plate against a plain background can be more striking than a complex scene.

Trick 7: Garnish and Final Touches

The final touches, like garnishing, can make all the difference in your food photos. They add color, texture, and a sense of freshness.

Importance of Garnishing

A simple garnish can elevate the look of a dish. Fresh herbs, a sprinkle of spices, or a drizzle of sauce can add the finishing touch that makes your food look irresistible.

How to Use Sauces and Drizzles Effectively

Drizzles of sauce or honey can add movement and visual interest to your photos. However, be strategic—less is often more to avoid overwhelming the dish.

Trick 8: Incorporate Human Elements

Adding a human element to your photos can create a connection with your audience and add a storytelling dimension to your shots.

Adding Hands or Utensils in the Shot

Including hands in your photos—whether holding a fork, cutting into a dish, or pouring a drink—can make the image feel more dynamic and relatable.

Creating a Storytelling Element

Think about the story you want your photo to tell. Is it a cozy breakfast on a rainy day? A festive dinner with friends? Incorporating human elements can help convey that narrative.

Trick 9: Experiment with Textures

Texture adds depth and interest to food photography, making the food look more tangible and appetizing.

Combining Soft and Crispy Textures

Contrast soft and crispy textures to create visual interest. For example, a crispy crust on a soft pie filling or crunchy nuts on a smooth yogurt.

Using Textiles and Surfaces to Enhance Texture

Incorporate textiles like napkins or rustic surfaces like wooden boards to add texture and warmth to your photos.

Trick 10: Edit Like a Pro

Even the best-shot photos can benefit from a little post-processing. Editing allows you to enhance the colors, contrast, and sharpness of your images.

Basic Editing Tools and Techniques

Use basic editing tools to adjust exposure, contrast, and white balance. A slight increase in sharpness and saturation can make your food photos pop.

Enhancing Color, Contrast, and Sharpness

Be careful not to overdo it—natural-looking photos are usually more appealing. The goal is to enhance the natural beauty of the food, not to make it look artificial.

Conclusion

Food photography is both an art and a science. By mastering these 10 tricks—lighting, freshness, props, color, perspectives, simplicity, garnishing, human elements, textures, and editing—you can transform your food photos into mouth-watering images that captivate your audience. The key is to practice, experiment, and develop your unique style.

codifycraft31

RECENT POSTS

CATEGORIES